Creating a LDK Entitlement
When you create a LDK Entitlement, you can:
- Specify the Products for which you want to create the Entitlement.
- Edit the license terms for individual Features.
- Edit the content and layout of the memory data stored in Sentinel protection keys.
To create a LDK Entitlement:
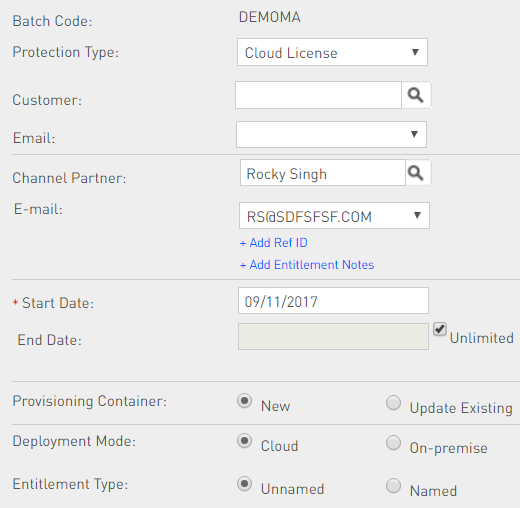
- From the Protection Type drop-down list, select LDK License.
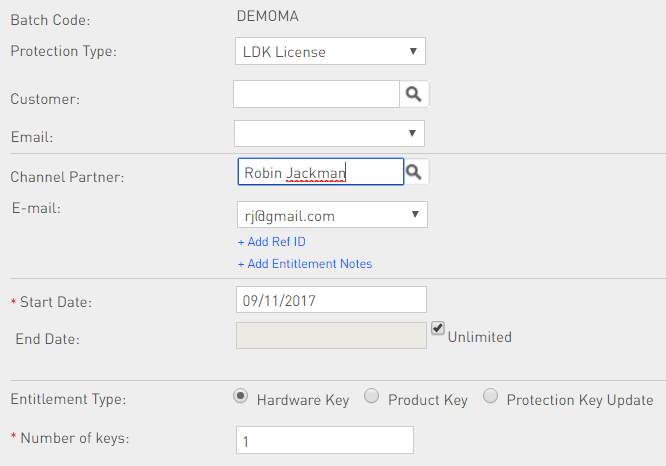
- (Optional). In the Customer field, specify a Customer for which you are creating the Entitlement.
- If the Customer has multiple contact e-mail IDs, you can choose one from the E-mail drop-down list. If the Customer does not have any e-mail ID, you can leave this field blank.
-
(Optional) In the Channel Partner field, type the first few characters of the channel partner name. A list of matching names is populated. Select a name from the list or click <<ADD NEW>> to create a new channel partner. To perform an advanced search, click
 .
.On the Creating a Channel Partner page, you associate product(s) with channel partners. When such a channel partner is entered here, only products associated with that channel partner can be added to the entitlement (see step 13).
- If the Channel Partner has multiple contact e-mail IDs, you can choose one from the E-mail drop-down list.
- (Optional) To add reference IDs, click the Add Ref ID link. The Ref ID 1 and Ref ID 2 fields appear. In these fields you can enter information that identifies the Entitlement in another system. For example, the order code in your company's ERP system.
- (Optional) To add a description to the Product, click the Add Entitlement Notes link. The Comments field appears. In this field, you can enter text to provide additional information about the Product (maximum length 500 characters).
- Enter Start Date and End Date for the Entitlement. To extend the end date indefinitely, select the Unlimited check box.
-
In the Entitlement Type field, specify one of the following:
- Hardware Key—Writes the Entitlement items to one or more Sentinel HL keys.
- Product Key—Associates the Entitlement items to one or more Product Keys.
- Protection Key Update—Enables changes to be made to the license data stored in deployed keys.
- To select the products to be included in the entitlement, click + Add Product. The Product Selection pop-up appears.

When you click the + Add Product button, products associated with the channel partner are displayed so that they can be included in the entitlement. However, if either of the following conditions is true, product filtering will fail and all products will be displayed.
- The master key is unplugged and multiple batch codes are present in the EMS database.
- The master key is plugged and either feature 12 license has expired or channel partner module is not present in the master key.
You may also see the Add Products From State button on this pane. This button is available only if your Sentinel EMS administrator has selected the Allow adding Products from State check box in the Admin Console. This allows you to copy the Product details from a previous C2V file or Key ID to the Entitlement. - Select one or more Products.
- Click Add Products to Entitlement. The selected Products are added to the Entitlement.
The Product specifications must be compatible with the Entitlement type. For example, you cannot add a Product that must be locked to a Sentinel HL key to an Entitlement for Sentinel SL keys.
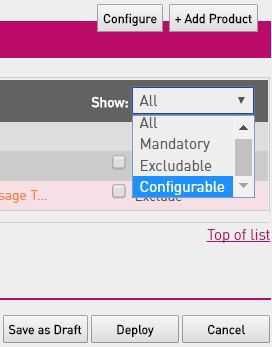
- By default, only the Features for which license terms need to be defined are displayed. You can change the display option from the Show drop-down list. Following options are available:
- All: Details of all Features in all the Products are displayed.
- Mandatory: Only mandatory (not excludable) Features are displayed.
- Excludable: Only the Features that were specified as Excludable at the time the Product was created are displayed.
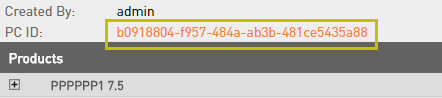
- Configurable: Only the Features for which license terms have not been be defined are displayed. The License Terms for such Features are shown in orange. After the values are defined, the License Terms are shown in green.
- Configure rehosting for Products for which rehosting needs to be specified during Entitlement creation. For such Products, a drop-down list appears in the Rehost column. Select a value from the following:
- Enable—Enable rehosting for the Product.
- Disable—Disable rehosting for the Product.
- Leave as it is—Retain the value of rehost as is in the Protection key.
- If you want to exclude a Feature from the Product, select the Exclude check box. Only Features that were specified as Excludable at the time the Product was created can be excluded.
- Select a Product and click Memory to display the Memory pop-up. For more information about editing memory data, see Editing Memory Data During Entitlement Generation.
- By default, only the Features for which license terms need to be defined are displayed. You can change the display option from the Show drop-down list. Following options are available:
- For each Feature for which license term values have not been defined, an orange link appears in the License Terms column. Click this link to specify the required values for the Entitlement. After the values are defined the License Terms are shown in green.
-
Save as Draft, Queue, or Produce the Entitlement:
- Save as Draft—save the Entitlement in Draft state until it is ready to be added to the production queue.
- Queue—make the Entitlement available for production.
- Produce—produce the Entitlement immediately.
Enter the first few characters of the Customer name (alphanumeric) or the Customer ID (numeric). A list of matching Customers is populated. Select a name from the list or click <<ADD NEW>> to create a new Customer.
If the list displays multiple customers having the same name, select any one of them. A pop-up appears, which displays additional information (e-mail, CRM ID, Ref ID, Customer ID) about the customer. Select the relevant customer and click OK.
To perform an advanced search, click .
For multiple Features that require the same licensing details, select the Features and click Configure to display the Configure License Terms pop-up. For detailed information on specifying license terms, see Defining License Terms for an LDK Product.
The Entitlement can be added to the production queue or produced only after the license term values have been defined for all the Features in all the Products included in the Entitlement.
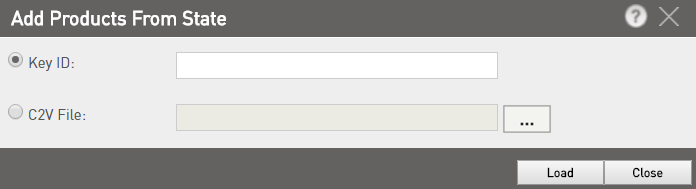
 to browse and select the C2V file.