Open the Table of Contents
Defining Memory Data
This section is relevant only for LDK Products/Entitlements.
The Define Memory Data tab of the Product Properties pop-up enables you to define the layout and contents of the memory data associated with the Product. This data is written to the Sentinel protection keys when an order for the Product is produced, or when the Product is activated using a Sentinel protection key.
You can define segments in memory according to your requirements, and you can select different colors for the segments to make it easy to identify them. After you have defined a memory segment, you can enter data into the segment. You can redefine the data and segment layout as required. Alternatively, you can select the Specify at Entitlement time check box for one or more segments to enable staff to enter Customer-specific data when an order is being processed. You can associate both Dynamic memory as well as Default Memory with a Product.
- Default Memory: Default memory is smaller in size and is used to define segments in memory according to your requirements. Default memory defined is specific to a Product for which it is defined.
- Dynamic Memory: Dynamic memory is significantly larger than the Default memory. However, dynamic memory space is shared between dynamic memory files (the space available to you for your applications, similar to default memory files) and license data (Features and Product). All space that is not utilized for license data can be used for dynamic memory files. Dynamic memory can be divided into dynamic memory files. Each file is assigned an identifier, which is used by your application to refer to that file. You can assign a size to the file at the time you create it, or allow the file size to be assigned automatically based on the amount of data that is written to the file. This files are reusable across products. For more information on see, Managing Dynamic Memory.
Default Memory
To define a new segment and data in memory:
-
For a Product, select the Memory tab in the Create Product pop-up.

- From the Type drop-down list, select Default Memory.
To associate dynamic memory, select the Dynamic Memory option. By default, the Default Memory option will be automatically selected.
- Select the required memory type for the new segment from the Memory Type drop-down list:
- Read/Write Memory: Data that can be updated at run-time. For example, value variables for counters, information retrieved during interaction with the end user, and so on.
- Read-Only Memory: Data to be read at run-time. For example, the Product version number, text to be used in a "Welcome" message, fixed threshold values for counters, and so on.
- If you prefer to use hexadecimal definitions instead of decimal definitions to define offset locations and addresses in memory, select the Hex addresses check box.
-
To define a new area in memory, click New. The New Memory Segment pop-up appears.
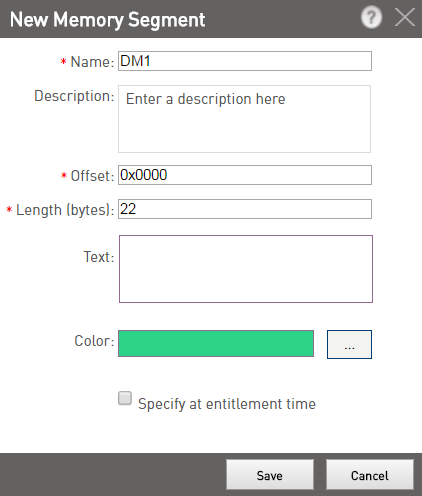
- Type a Name (maximum 50 characters) and Description (maximum 250 characters) for the new memory segment. These fields are optional.
- Enter the Offset and Length of the new segment. You can select a Color from the palettes that will help you identify the segment.
Length can have value 1–4032 for read/write memory and 1–2048 for read-only memory.
- In the Text field, enter the memory data.
You must exercise caution while entering memory data in this field. Copying and pasting data from the Sentinel LDK Toolbox may lead to data modification during the copying process.
- If you require the memory data for the New Memory Segment to be entered during Entitlement generation, select the Specify at Entitlement time check box.
When defining memory data for a Unlocked Product, you cannot specify that the data will be entered during Entitlement generation.
- Click Save. The newly defined area is displayed in the lower section of the Memory tab. The segment addresses are displayed on the left.
To edit segments and data in memory:
- To edit the offset, size, or color of a memory segment, select the segment and click Edit. Make the required changes in the Edit Memory Segment pop-up and click Save to update the changes.
- To delete a memory segment, select the segment and click Delete. The segment is deleted.
- To save a memory segment as a XML file, select the segment and click Save. The File Download dialog box appears. Save the file to a directory in your system (default file name is memory.xml).
- To load a memory segment from a file, click Load. The Load Memory File pop-up appears. Click Browse to navigate to the directory containing the saved memory segments, select the required memory segment, and click Load. The selected memory segment is loaded.
During Product definition, a loaded memory segment overwrites any pre-existing memory in that segment.
- To unload a previously loaded memory segment from a file, select the segment and click the Undo. The memory unloads the last-loaded segment.
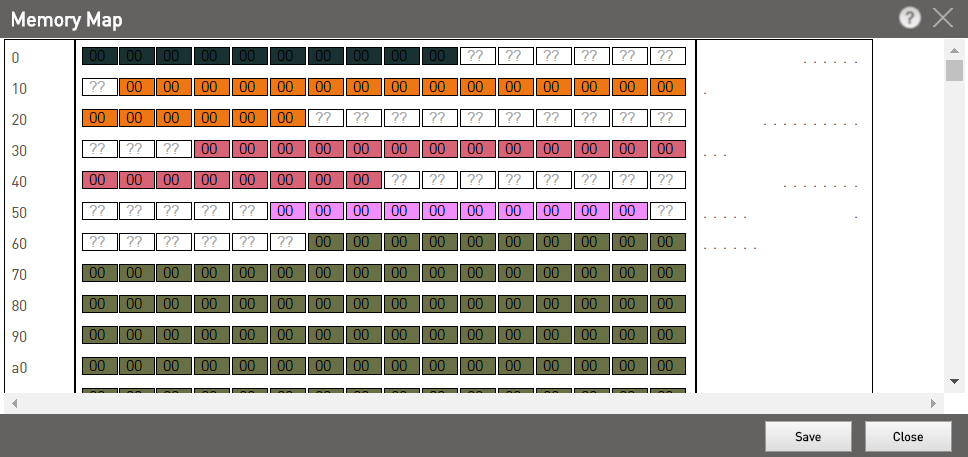
- To display the memory map click Map.
If your machine has Java version 7u55 or above, you may receive a security warning(provided your web browser supports Java based applets): "Allow access to the following application from this web site?". If the Publisher is Gemalto Inc. and Application is Sentinel EMS, you can safely click Allow and move forward. We recommend that you click the Do not show this again for this app and website check box to suppress this security warning from appearing on subsequent visits to this page.
When you have finished defining the memory segments and data, you can click the Select Feature tab to continue defining the properties for the Product.
If you have finished defining the Product properties, click Save in the Product Properties pop-up. The new or updated Product is displayed in the Products page.
Dynamic Memory
To define a new segment and data in memory:
-
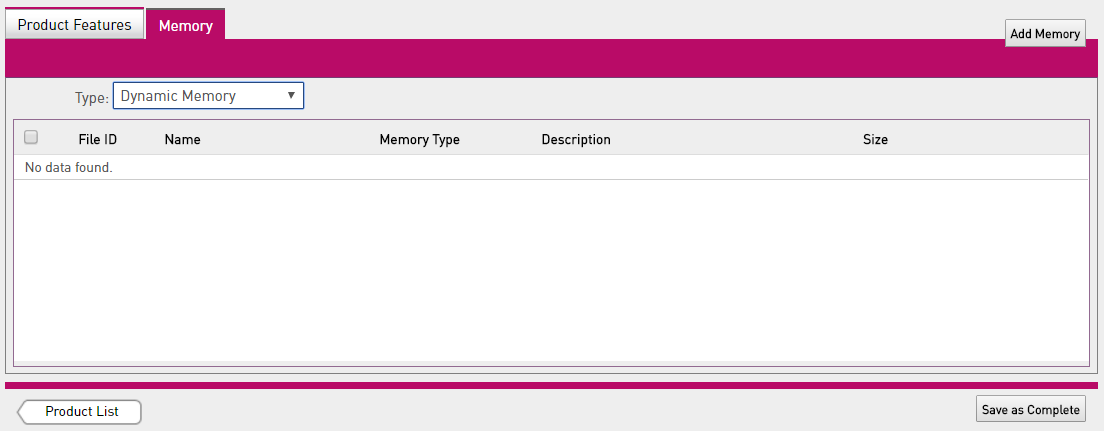
For a Product, select the Memory tab in the Create Product pop-up.
- From the Type drop-down list, select Dynamic Memory to associate a dynamic memory file with the product.
- Click Add Memory. The Add Memory Files to Product pop-up appears.
- Select check box corresponding existing memory file(s) and click Add Memory. The selected memory files are associated to the Product.
Each dynamic memory file associated with a single product must have a unique FileID. If you select multiple dynamic memory files having the same FileID or select a dynamic memory file with a FileID similar to a previously associated file (for the same product); in either case an alert message is displayed and the system does not allow you to proceed further.
- Click the Configure link corresponding Dynamic Memory file added to configure details. The Memory Segment Details pop-up appears.

- Configure details as required.
- Click Save.
-
To remove an existing memory segment, select the check box corresponding to it and click Delete Memory.
If you have finished defining the Product properties, click Save as Complete in the Product Properties pop-up. The new or updated Product is displayed in the Products page.